终于到了来试试OpenEuler了,之前的Ubuntu、CentOS都累积了一些经验,来试试这个国产系统吧。因为OpenEuler主要是用dnf命令来管理包的,顺便也学习了一下dnf命令了。
安装 官方安装教程:https://docs.openeuler.org/zh/docs/24.03_LTS/docs/Installation/%E5%AE%89%E8%A3%85%E6%8C%87%E5%AF%BC.html
本渣用的是VMBox,4C8G,桥接模式,100G硬盘,128M显存,下载官方的openEuler 24.03 LTS - Offline Standard ISOhttps://www.openeuler.org/zh/download/?version=openEuler%2024.03%20LTS
刚刚安装好的内存占用有500+M,还是挺高的,官方最低建议要求2C48+120G
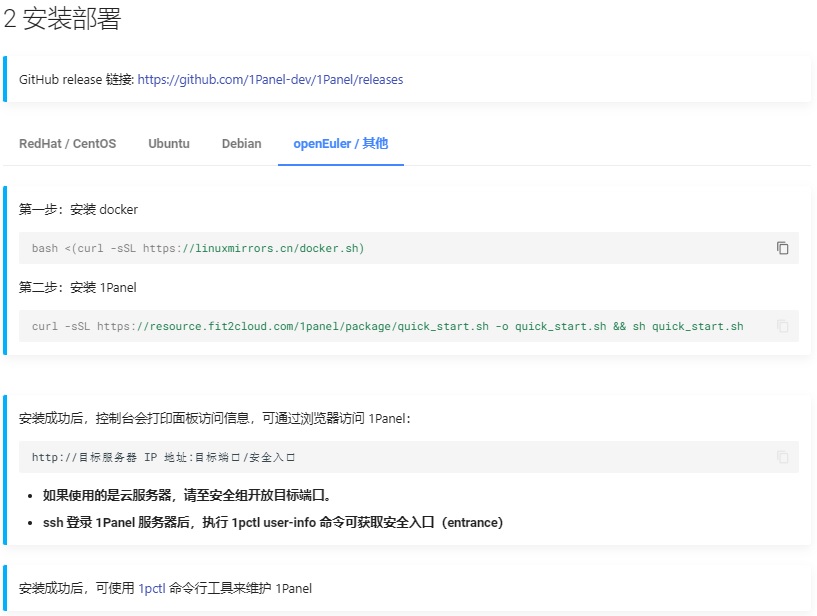
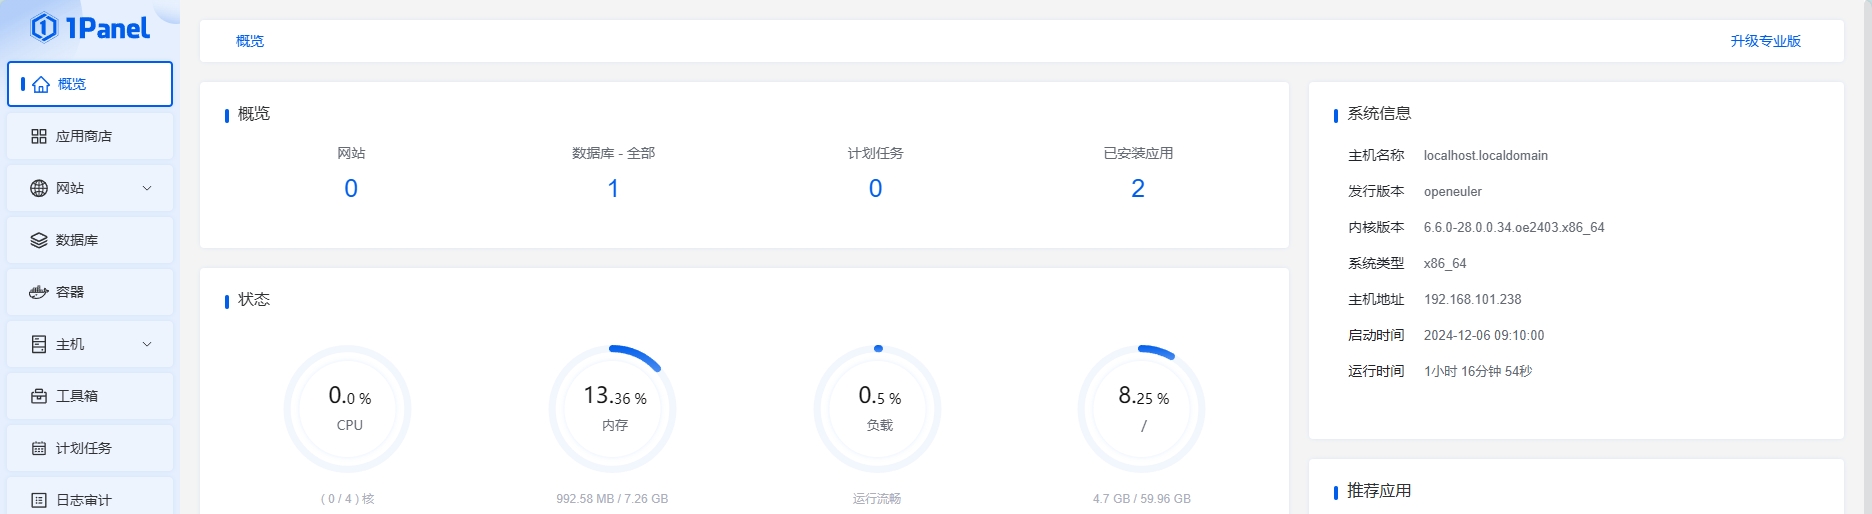
测试安装应用1Panel 官方安装方法:https://1panel.cn/docs/installation/online_installation/
1Panel竟然有针对OpenEuler的安装方法,难度是要基于Docker来使用1panel? 但是发现不是的,运行成功后镜像里面没有1Panel的镜像。
以下是整个安装过程:
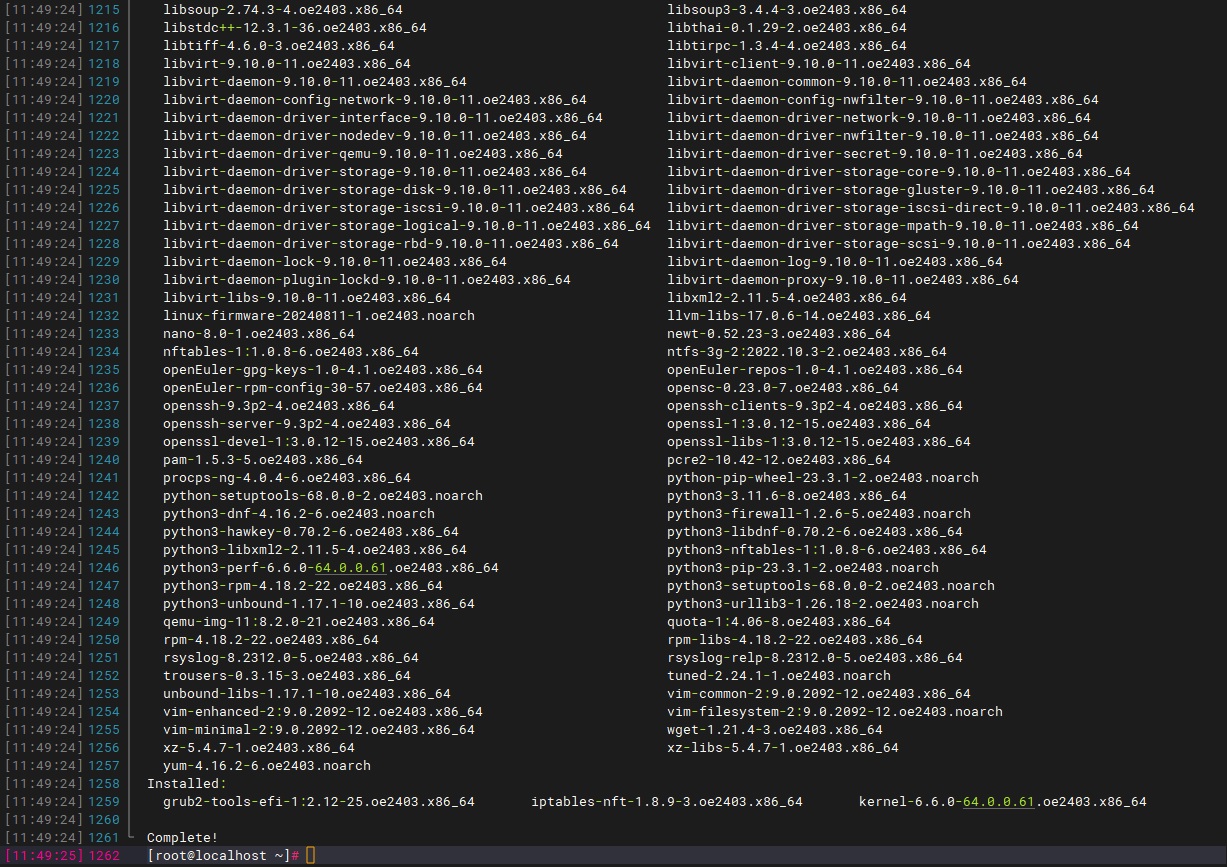
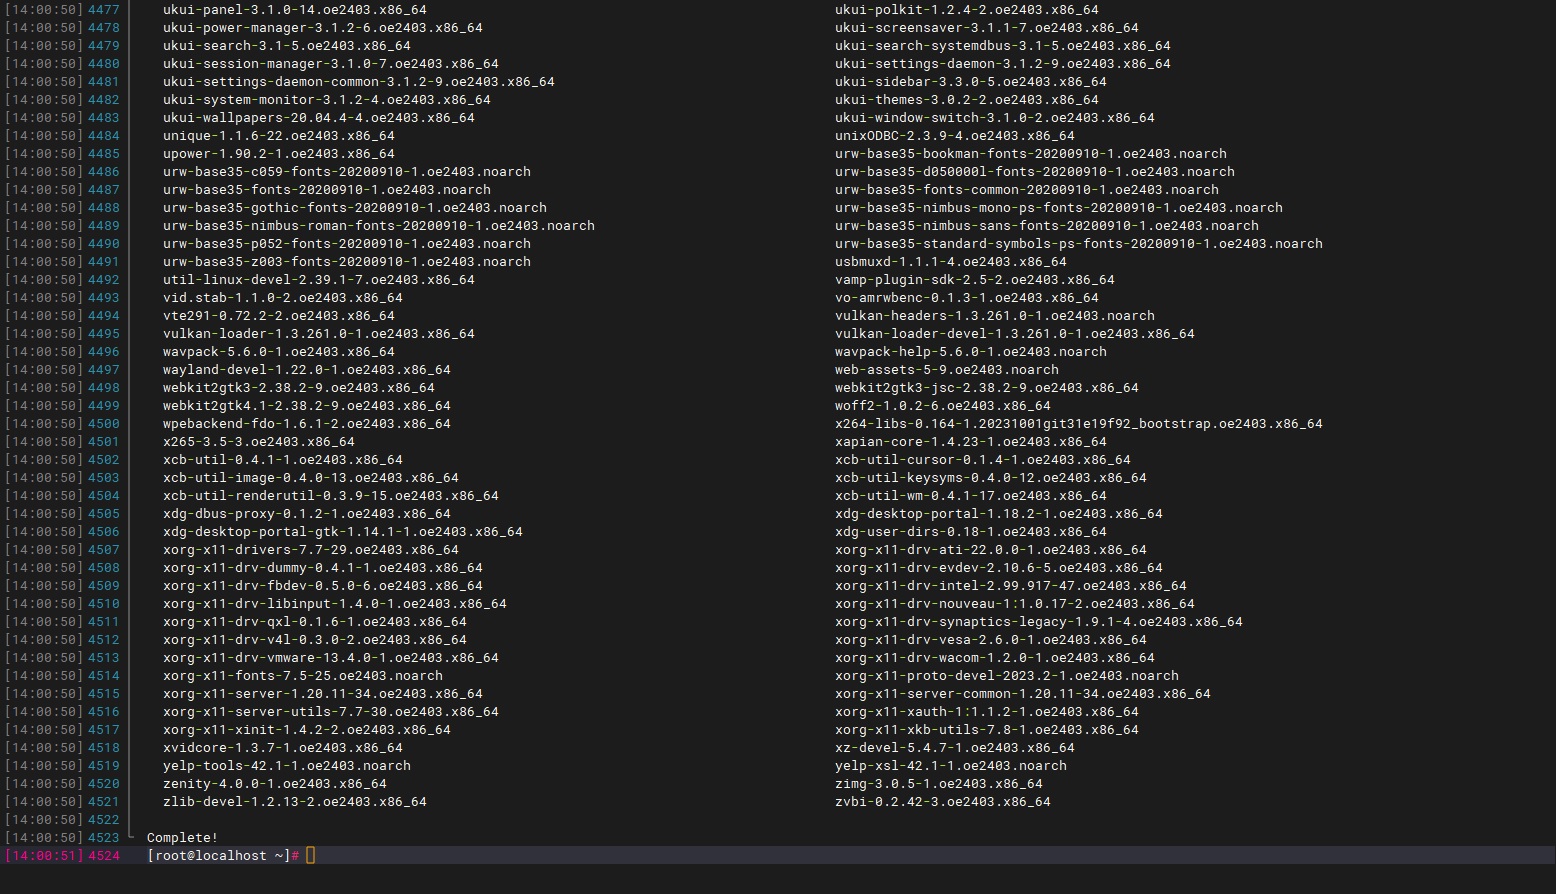
1
2
3
4
5
6
7
8
9
10
11
12
13
14
15
16
17
18
19
20
21
22
23
24
25
26
27
28
29
30
31
32
33
34
35
36
37
38
39
40
41
42
43
44
45
46
47
48
49
50
51
52
53
54
55
56
57
58
59
60
61
62
63
64
65
66
67
68
69
70
71
72
73
74
75
76
77
78
79
80
81
82
83
84
85
86
87
88
89
90
91
92
93
94
95
96
97
98
99
100
101
102
103
104
105
106
107
108
109
110
111
112
113
114
115
116
117
118
119
120
121
122
123
124
125
126
127
128
129
130
131
132
133
134
135
136
137
138
139
140
141
142
143
144
145
146
147
148
149
150
151
152
153
154
155
156
157
158
159
160
161
162
163
164
165
166
167
168
169
170
171
172
173
174
175
176
177
178
179
180
181
182
183
184
185
186
187
188
189
190
191
192
193
194
195
196
197
198
199
200
201
202
203
204
205
206
207
208
209
210
211
212
213
214
215
216
217
218
219
220
221
222
223
224
225
226
227
228
229
230
231
232
233
234
235
236
237
238
239
240
241
242
243
244
245
246
247
248
249
250
251
252
253
254
255
256
257
258
259
260
261
262
263
264
265
266
267
268
269
270
271
272
273
274
275
276
277
278
279
280
281
282
283
284
285
286
287
288
289
290
291
292
293
294
295
296
297
298
299
300
301
302
303
304
305
306
307
308
309
310
311
312
313
314
315
316
317
318
319
[root@localhost ~]# bash <(curl -sSL https://linuxmirrors.cn/docker.sh) +-----------------------------------+ | ⡇ ⠄ ⣀⡀ ⡀⢀ ⡀⢀ ⡷⢾ ⠄ ⡀⣀ ⡀⣀ ⢀⡀ ⡀⣀ ⢀⣀ | | ⠧⠤ ⠇ ⠇⠸ ⠣⠼ ⠜⠣ ⠇⠸ ⠇ ⠏ ⠏ ⠣⠜ ⠏ ⠭⠕ | +-----------------------------------+ 欢迎使用 Docker Engine 安装与换源脚本 运行环境 openEuler 24.03 (LTS) x86_64 系统时间 2024-12-05 14:33 Asia/Shanghai └─ 是否安装最新版本的 Docker Engine? [Y/n] y ❖ 阿里云 1) ❖ 腾讯云 2) ❖ 华为云 3) ❖ 微软 Azure 中国 4) ❖ 网易 5) ❖ 火山引擎 6) ❖ 清华大学 7) ❖ 北京大学 8) ❖ 南京大学 9) ❖ 上海交通大学 10) ❖ 中国科学技术大学 11) ❖ 中国科学院软件研究所 12) ❖ 官方 13) └─ 请选择并输入你想使用的 Docker CE 源 [ 1-13 ]:1 ❖ Docker Proxy(推荐) 1) ❖ 道客 DaoCloud 2) ❖ AtomHub 可信镜像中心 3) ❖ 阿里云(杭州) 4) ❖ 阿里云(上海) 5) ❖ 阿里云(青岛) 6) ❖ 阿里云(北京) 7) ❖ 阿里云(张家口) 8) ❖ 阿里云(呼和浩特) 9) ❖ 阿里云(乌兰察布) 10) ❖ 阿里云(深圳) 11) ❖ 阿里云(河源) 12) ❖ 阿里云(广州) 13) ❖ 阿里云(成都) 14) ❖ 阿里云(香港) 15) ❖ 阿里云(日本-东京) 16) ❖ 阿里云(新加坡) 17) ❖ 阿里云(澳大利亚-悉尼) 18) ❖ 阿里云(马来西亚-吉隆坡) 19) ❖ 阿里云(印度尼西亚-雅加达) 20) ❖ 阿里云(印度-孟买) 21) ❖ 阿里云(德国-法兰克福) 22) ❖ 阿里云(英国-伦敦) 23) ❖ 阿里云(美国西部-硅谷) 24) ❖ 阿里云(美国东部-弗吉尼亚) 25) ❖ 阿里云(阿联酋-迪拜) 26) ❖ 腾讯云 27) ❖ 谷歌云 28) ❖ 官方 Docker Hub 29) └─ 请选择并输入你想使用的 Docker Registry 源 [ 1-29 ]:1 └─ 是否关闭防火墙和 SELinux ? [Y/n] y >_ 开始生成软件源缓存... OS 43 kB/s | 3.5 kB 00:00 everything 61 kB/s | 3.5 kB 00:00 EPOL 44 kB/s | 3.0 kB 00:00 debuginfo 39 kB/s | 3.5 kB 00:00 source 57 kB/s | 3.5 kB 00:00 update 49 kB/s | 3.5 kB 00:00 update-source 3.1 kB/s | 3.5 kB 00:01 Metadata cache created. ✔ 生成软件源缓存结束 Package dnf-plugins-core-4.3.1-4.oe2403.noarch is already installed. Package thin-provisioning-tools-0.9.0-4.oe2403.x86_64 is already installed. Package lvm2-8:2.03.21-8.oe2403.x86_64 is already installed. Dependencies resolved. Nothing to do . Complete! 添加仓库自:https://mirrors.aliyun.com/docker-ce/linux/centos/docker-ce.repo Docker CE Stable - x86_64 3.8 kB/s | 59 kB 00:15 OS 32 kB/s | 3.5 kB 00:00 everything 59 kB/s | 3.5 kB 00:00 EPOL 58 kB/s | 3.0 kB 00:00 debuginfo 63 kB/s | 3.5 kB 00:00 source 69 kB/s | 3.5 kB 00:00 update 58 kB/s | 3.5 kB 00:00 update-source 8.2 kB/s | 3.5 kB 00:00 Metadata cache created. Last metadata expiration check: 0:00:05 ago on 2024年12月05日 星期四 14时35分01秒. Dependencies resolved. ================================================================================================================ Package Architecture Version Repository Size ================================================================================================================ Installing: containerd.io x86_64 1.7.24-3.1.el9 docker-ce-stable 43 M docker-buildx-plugin x86_64 0.17.1-1.el9 docker-ce-stable 14 M docker-ce x86_64 3:27.3.1-1.el9 docker-ce-stable 27 M docker-ce-cli x86_64 1:27.3.1-1.el9 docker-ce-stable 8.0 M docker-compose-plugin x86_64 2.29.7-1.el9 docker-ce-stable 13 M Installing dependencies: container-selinux noarch 2:2.230.0-1.oe2403 OS 45 k fuse-overlayfs x86_64 1.13-1.oe2403 EPOL 56 k fuse3 x86_64 3.16.2-1.oe2403 OS 117 k libslirp x86_64 4.7.0-2.oe2403 OS 69 k slirp4netns x86_64 1.2.3-1.oe2403 EPOL 47 k Installing weak dependencies: docker-ce-rootless-extras x86_64 27.3.1-1.el9 docker-ce-stable 4.4 M fuse3-help x86_64 3.16.2-1.oe2403 OS 9.4 k Transaction Summary ================================================================================================================ Install 12 Packages Total download size: 110 M Installed size: 427 M Downloading Packages: (1/12): docker-buildx-plugin-0.17.1-1.el9.x86_64.rpm 402 kB/s | 14 MB 00:34 (2/12): docker-ce-27.3.1-1.el9.x86_64.rpm 386 kB/s | 27 MB 01:11 (3/12): docker-ce-cli-27.3.1-1.el9.x86_64.rpm 190 kB/s | 8.0 MB 00:43 (4/12): docker-ce-rootless-extras-27.3.1-1.el9.x86_64.rpm 385 kB/s | 4.4 MB 00:11 (5/12): container-selinux-2.230.0-1.oe2403.noarch.rpm 119 kB/s | 45 kB 00:00 (6/12): fuse3-3.16.2-1.oe2403.x86_64.rpm 308 kB/s | 117 kB 00:00 (7/12): fuse3-help-3.16.2-1.oe2403.x86_64.rpm 136 kB/s | 9.4 kB 00:00 (8/12): libslirp-4.7.0-2.oe2403.x86_64.rpm 319 kB/s | 69 kB 00:00 (9/12): fuse-overlayfs-1.13-1.oe2403.x86_64.rpm 435 kB/s | 56 kB 00:00 (10/12): slirp4netns-1.2.3-1.oe2403.x86_64.rpm 295 kB/s | 47 kB 00:00 (11/12): docker-compose-plugin-2.29.7-1.el9.x86_64.rpm 546 kB/s | 13 MB 00:25 (12/12): containerd.io-1.7.24-3.1.el9.x86_64.rpm 399 kB/s | 43 MB 01:49 ---------------------------------------------------------------------------------------------------------------- Total 1.0 MB/s | 110 MB 01:49 Docker CE Stable - x86_64 5.1 kB/s | 1.6 kB 00:00 Importing GPG key 0x621E9F35: Userid : "Docker Release (CE rpm) <docker@docker.com>" Fingerprint: 060A 61C5 1B55 8A7F 742B 77AA C52F EB6B 621E 9F35 From : https://mirrors.aliyun.com/docker-ce/linux/centos/gpg Key imported successfully retrieving repo key for OS unencrypted from http://repo.openeuler.org/openEuler-24.03-LTS/OS/x86_64/RPM-GPG-KEY-openEuler OS 58 kB/s | 3.0 kB 00:00 Importing GPG key 0xB675600B: Userid : "openeuler <openeuler@compass-ci.com>" Fingerprint: 8AA1 6BF9 F2CA 5244 010D CA96 3B47 7C60 B675 600B From : http://repo.openeuler.org/openEuler-24.03-LTS/OS/x86_64/RPM-GPG-KEY-openEuler Key imported successfully Running transaction check Transaction check succeeded. Running transaction test Transaction test succeeded. Running transaction Preparing : 1/1 Running scriptlet: container-selinux-2:2.230.0-1.oe2403.noarch 1/12 Installing : container-selinux-2:2.230.0-1.oe2403.noarch 1/12 Running scriptlet: container-selinux-2:2.230.0-1.oe2403.noarch 1/12 Installing : docker-compose-plugin-2.29.7-1.el9.x86_64 2/12 Running scriptlet: docker-compose-plugin-2.29.7-1.el9.x86_64 2/12 Installing : containerd.io-1.7.24-3.1.el9.x86_64 3/12 Running scriptlet: containerd.io-1.7.24-3.1.el9.x86_64 3/12 Installing : libslirp-4.7.0-2.oe2403.x86_64 4/12 Installing : slirp4netns-1.2.3-1.oe2403.x86_64 5/12 Installing : fuse3-help-3.16.2-1.oe2403.x86_64 6/12 Installing : fuse3-3.16.2-1.oe2403.x86_64 7/12 Running scriptlet: fuse3-3.16.2-1.oe2403.x86_64 7/12 Installing : fuse-overlayfs-1.13-1.oe2403.x86_64 8/12 Running scriptlet: fuse-overlayfs-1.13-1.oe2403.x86_64 8/12 Installing : docker-buildx-plugin-0.17.1-1.el9.x86_64 9/12 Running scriptlet: docker-buildx-plugin-0.17.1-1.el9.x86_64 9/12 Installing : docker-ce-cli-1:27.3.1-1.el9.x86_64 10/12 Running scriptlet: docker-ce-cli-1:27.3.1-1.el9.x86_64 10/12 Installing : docker-ce-rootless-extras-27.3.1-1.el9.x86_64 11/12 Running scriptlet: docker-ce-rootless-extras-27.3.1-1.el9.x86_64 11/12 Installing : docker-ce-3:27.3.1-1.el9.x86_64 12/12 Running scriptlet: docker-ce-3:27.3.1-1.el9.x86_64 12/12 Running scriptlet: container-selinux-2:2.230.0-1.oe2403.noarch 12/12 Running scriptlet: docker-ce-3:27.3.1-1.el9.x86_64 12/12 Verifying : containerd.io-1.7.24-3.1.el9.x86_64 1/12 Verifying : docker-buildx-plugin-0.17.1-1.el9.x86_64 2/12 Verifying : docker-ce-3:27.3.1-1.el9.x86_64 3/12 Verifying : docker-ce-cli-1:27.3.1-1.el9.x86_64 4/12 Verifying : docker-ce-rootless-extras-27.3.1-1.el9.x86_64 5/12 Verifying : docker-compose-plugin-2.29.7-1.el9.x86_64 6/12 Verifying : container-selinux-2:2.230.0-1.oe2403.noarch 7/12 Verifying : fuse3-3.16.2-1.oe2403.x86_64 8/12 Verifying : fuse3-help-3.16.2-1.oe2403.x86_64 9/12 Verifying : libslirp-4.7.0-2.oe2403.x86_64 10/12 Verifying : fuse-overlayfs-1.13-1.oe2403.x86_64 11/12 Verifying : slirp4netns-1.2.3-1.oe2403.x86_64 12/12 Installed: container-selinux-2:2.230.0-1.oe2403.noarch containerd.io-1.7.24-3.1.el9.x86_64 docker-buildx-plugin-0.17.1-1.el9.x86_64 docker-ce-3:27.3.1-1.el9.x86_64 docker-ce-cli-1:27.3.1-1.el9.x86_64 docker-ce-rootless-extras-27.3.1-1.el9.x86_64 docker-compose-plugin-2.29.7-1.el9.x86_64 fuse-overlayfs-1.13-1.oe2403.x86_64 fuse3-3.16.2-1.oe2403.x86_64 fuse3-help-3.16.2-1.oe2403.x86_64 libslirp-4.7.0-2.oe2403.x86_64 slirp4netns-1.2.3-1.oe2403.x86_64 Complete! 当前安装版本:Docker version 27.3.1, build ce12230 ✔ 安装完成 ✨️ Powered by https://linuxmirrors.cn [root@localhost ~]# docker -v Docker version 27.3.1, build ce12230 [root@localhost ~]# systemctl status docker ● docker.service - Docker Application Container Engine Loaded: loaded (/usr/lib/systemd/system/docker.service; enabled; preset: disabled) Active: active (running) since Thu 2024-12-05 14:38:18 CST; 1min 8s ago TriggeredBy: ● docker.socket Docs: https://docs.docker.com Main PID: 11597 (dockerd) Tasks: 10 Memory: 22.7M () CGroup: /system.slice/docker.service └─11597 /usr/bin/dockerd -H fd:// --containerd=/run/containerd/containerd.sock 12月 05 14:38:17 localhost.localdomain systemd[1]: Starting Docker Application Container Engine... 12月 05 14:38:17 localhost.localdomain dockerd[11597]: time ="2024-12-05T14:38:17.670510965+08:00" level=info ms> 12月 05 14:38:17 localhost.localdomain dockerd[11597]: time ="2024-12-05T14:38:17.744975157+08:00" level=info ms> 12月 05 14:38:18 localhost.localdomain dockerd[11597]: time ="2024-12-05T14:38:18.038675216+08:00" level=info ms> 12月 05 14:38:18 localhost.localdomain dockerd[11597]: time ="2024-12-05T14:38:18.068880560+08:00" level=warning> 12月 05 14:38:18 localhost.localdomain dockerd[11597]: time ="2024-12-05T14:38:18.068913672+08:00" level=warning> 12月 05 14:38:18 localhost.localdomain dockerd[11597]: time ="2024-12-05T14:38:18.068939962+08:00" level=info ms> 12月 05 14:38:18 localhost.localdomain dockerd[11597]: time ="2024-12-05T14:38:18.069155336+08:00" level=info ms> 12月 05 14:38:18 localhost.localdomain dockerd[11597]: time ="2024-12-05T14:38:18.125037294+08:00" level=info ms> 12月 05 14:38:18 localhost.localdomain systemd[1]: Started Docker Application Container Engine. [root@localhost ~]# docker images REPOSITORY TAG IMAGE ID CREATED SIZE [root@localhost ~]# docker pull hello-world Using default tag: latest latest: Pulling from library/hello-world Get "https://registry-1.docker.io/v2/" : net/http: request canceled while waiting for connection (Client.Timeout exceeded while awaiting headers) [root@localhost ~]# docker images REPOSITORY TAG IMAGE ID CREATED SIZE [root@localhost ~]# curl -sSL https://resource.fit2cloud.com/1panel/package/quick_start.sh -o quick_start.sh && sh quick_start.sh 开始下载 1Panel v1.10.21-lts 版本在线安装包 安装包下载地址: https://resource.fit2cloud.com/1panel/package/stable/v1.10.21-lts/release/1panel-v1.10.21-lts-linux-amd64.tar.gz % Total % Received % Xferd Average Speed Time Time Time Current Dload Upload Total Spent Left Speed 100 41.6M 100 41.6M 0 0 730k 0 0:00:58 0:00:58 --:--:-- 630k Warning: Got more output options than URLs 1panel-v1.10.21-lts-linux-amd64/1panel.service 1panel-v1.10.21-lts-linux-amd64/1pctl 1panel-v1.10.21-lts-linux-amd64/LICENSE 1panel-v1.10.21-lts-linux-amd64/README.md 1panel-v1.10.21-lts-linux-amd64/install.sh 1panel-v1.10.21-lts-linux-amd64/1panel ██╗ ██████╗ █████╗ ███╗ ██╗███████╗██╗ ███║ ██╔══██╗██╔══██╗████╗ ██║██╔════╝██║ ╚██║ ██████╔╝███████║██╔██╗ ██║█████╗ ██║ ██║ ██╔═══╝ ██╔══██║██║╚██╗██║██╔══╝ ██║ ██║ ██║ ██║ ██║██║ ╚████║███████╗███████╗ ╚═╝ ╚═╝ ╚═╝ ╚═╝╚═╝ ╚═══╝╚══════╝╚══════╝ [1Panel Log]: ======================= 开始安装 ======================= 设置 1Panel 安装目录(默认为/opt):1panel [1Panel Log]: 请输入目录的完整路径 设置 1Panel 安装目录(默认为/opt):/opt/1panel [1Panel Log]: 您选择的安装路径为 /opt/1panel 是否配置镜像加速?(y/n): y [1Panel Log]: 配置文件已存在,我们将备份现有配置文件为 /etc/docker/daemon.json.1panel_bak 并创建新的配置文件。 [1Panel Log]: 创建新的配置文件 /etc/docker/daemon.json... [1Panel Log]: 镜像加速配置已添加。 [1Panel Log]: 正在重启 Docker 服务... [1Panel Log]: Docker 服务已成功重启。 [1Panel Log]: ... 在线安装 docker-compose % Total % Received % Xferd Average Speed Time Time Time Current Dload Upload Total Spent Left Speed 100 59.8M 100 59.8M 0 0 994k 0 0:01:01 0:01:01 --:--:-- 587k [1Panel Log]: docker-compose 安装成功 设置 1Panel 端口(默认为20385):8090 [1Panel Log]: 您设置的端口为:8090 [1Panel Log]: 防火墙未开启,忽略端口开放 设置 1Panel 安全入口(默认为182897fd2e):1panel [1Panel Log]: 您设置的面板安全入口为:1panel 设置 1Panel 面板用户(默认为509396afeb):brian [1Panel Log]: 您设置的面板用户为:brian [1Panel Log]: 设置 1Panel 面板密码,设置完成后直接回车以继续(默认为4ff64cd4cd): ***** [1Panel Log]: 错误:面板密码仅支持字母、数字、特殊字符(!@#$%*_,.?),长度 8-30 位 [1Panel Log]: 设置 1Panel 面板密码,设置完成后直接回车以继续(默认为4ff64cd4cd): ********* [1Panel Log]: 配置 1Panel Service Created symlink /etc/systemd/system/multi-user.target.wants/1panel.service → /etc/systemd/system/1panel.service. [1Panel Log]: 启动 1Panel 服务 [1Panel Log]: 1Panel 服务启动成功! [1Panel Log]: [1Panel Log]: =================感谢您的耐心等待,安装已经完成================== [1Panel Log]: [1Panel Log]: 请用浏览器访问面板: [1Panel Log]: 外网地址: http://14.145.13.66:8090/1panel [1Panel Log]: 内网地址: http://192.168.101.238:8090/1panel [1Panel Log]: 面板用户: brian [1Panel Log]: 面板密码: <这里被本渣删除了> [1Panel Log]: [1Panel Log]: 项目官网: https://1panel.cn [1Panel Log]: 项目文档: https://1panel.cn/docs [1Panel Log]: 代码仓库: https://github.com/1Panel-dev/1Panel [1Panel Log]: [1Panel Log]: 如果使用的是云服务器,请至安全组开放 8090 端口 [1Panel Log]: [1Panel Log]: 为了您的服务器安全,在您离开此界面后您将无法再看到您的密码,请务必牢记您的密码。 [1Panel Log]: [1Panel Log]: ================================================================ [root@localhost ~]# ^C [root@localhost ~]# docker pull hello-world Using default tag: latest latest: Pulling from library/hello-world c1ec31eb5944: Pull complete Digest: sha256:305243c734571da2d100c8c8b3c3167a098cab6049c9a5b066b6021a60fcb966 Status: Downloaded newer image for hello-world:latest docker.io/library/hello-world:latest [root@localhost ~]# docker images REPOSITORY TAG IMAGE ID CREATED SIZE hello-world latest d2c94e258dcb 19 months ago 13.3kB
这个Docker和1Panel的安装同时完成了这些配置
防火墙被关了
SElinux被关了,虽然不知道是啥东东
Docker加速给加上了,可以看到我刚刚安装完Docker时候是下载不了hello-world镜像的,但是安装完1Panel后就能下载了。不过都安装了1Panel,都一些常用Docker应用就不测试了,1Panel应用商店都自带的。
1panel的操作命令 命令行运维官方教程:https://1panel.cn/docs/installation/cli/
1
2
3
4
5
6
7
8
9
10
11
12
13
14
15
16
Usage: 1pctl [COMMAND] [ARGS...] 1pctl --help Commands: status 查看 1Panel 服务运行状态 start 启动 1Panel 服务 stop 停止 1Panel 服务 restart 重启 1Panel 服务 uninstall 卸载 1Panel 服务 user-info 获取 1Panel 用户信息 listen-ip 切换 1Panel 监听 IP version 查看 1Panel 版本信息 update 修改 1Panel 系统信息 reset 重置 1Panel 系统信息 restore 恢复 1Panel 服务及数据
安装Docker的时候,sh命令关闭了防火墙和SElinux 可以看到防火墙被关闭了
1
2
3
4
5
6
7
8
9
10
11
12
[root@localhost ~]# systemctl status firewalld ○ firewalld.service - firewalld - dynamic firewall daemon Loaded: loaded (/usr/lib/systemd/system/firewalld.service; disabled; preset: enabled) Active: inactive (dead) Docs: man:firewalld(1) 12月 05 14:08:26 localhost systemd[1]: Starting firewalld - dynamic firewall daemon... 12月 05 14:08:28 localhost systemd[1]: Started firewalld - dynamic firewall daemon. 12月 05 14:34:30 localhost.localdomain systemd[1]: Stopping firewalld - dynamic firewall daemon... 12月 05 14:34:31 localhost.localdomain systemd[1]: firewalld.service: Deactivated successfully. 12月 05 14:34:31 localhost.localdomain systemd[1]: Stopped firewalld - dynamic firewall daemon.
Ctrl + C 可以关闭systemctl status firewalld的显示。
SElinux虽然不知道是什么鬼,但是看起来也是关闭了。
1
2
3
4
5
6
7
8
9
10
11
12
13
14
15
[root@localhost ~]# getenforce Permissive [root@localhost ~]# cat /etc/selinux/config SELINUX=disabled SELINUXTYPE=targeted
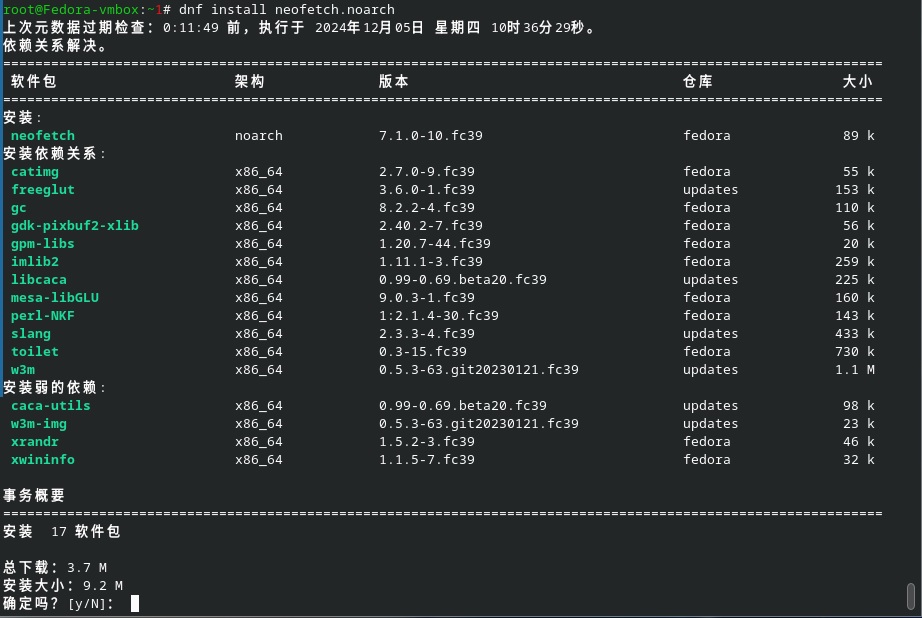
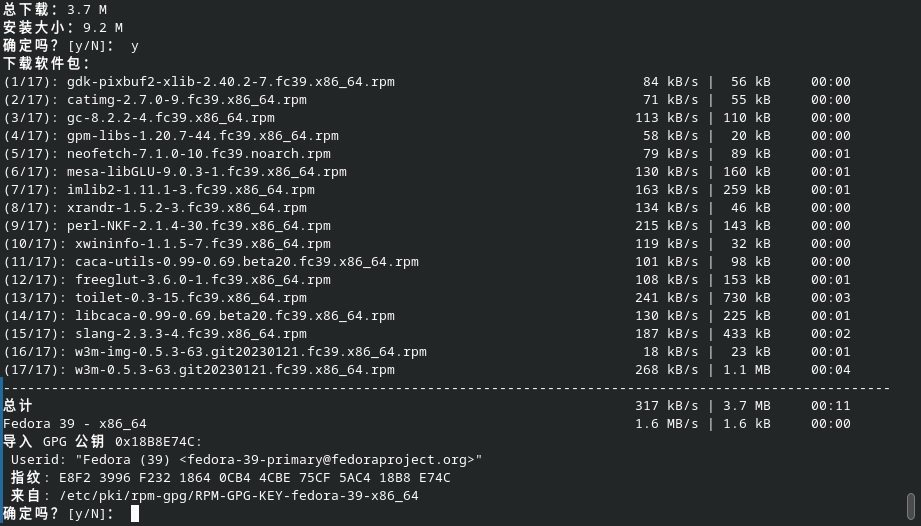
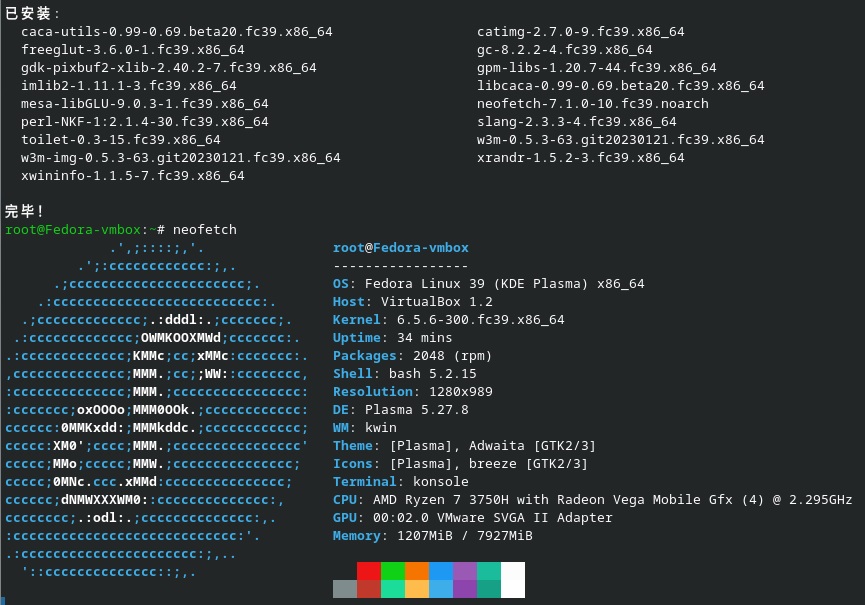
dnf常用命令(基于Fedora39) 因为OpenEuler没有一些常用的小玩意如neofetch,所以还是用Fedora来做测试。
dnf search “要搜索的关键词”
dnf install <要安装的包名> 1 2 dnf install neofetch.noarch
输入y再输入回车确认。y再输入回车确认。
dnf list installed | grep “搜索已经安装包的关键字” 1 2 dnf list installed | grep "neofetch"
dnf remove <要卸载的包名字>
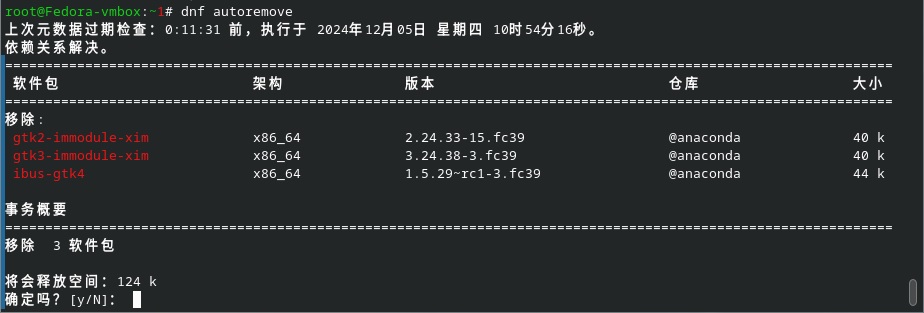
dnf autoremove
dnf upgrade or dnf update
dnf upgrade和dnf update二者区别
更新内容:dnf update主要用于更新软件包到最新的次要版本或修订版本,通常不包括主要版本的升级;而dnf upgrade则可能会升级到新的主要版本。
使用场景:当操作系统发布了新的安全补丁或错误修复时,通常使用dnf update来更新系统上的软件包;而当某个软件包发布了新的主要版本,并希望升级到该版本时,则使用dnf upgrade。
dnf check-update
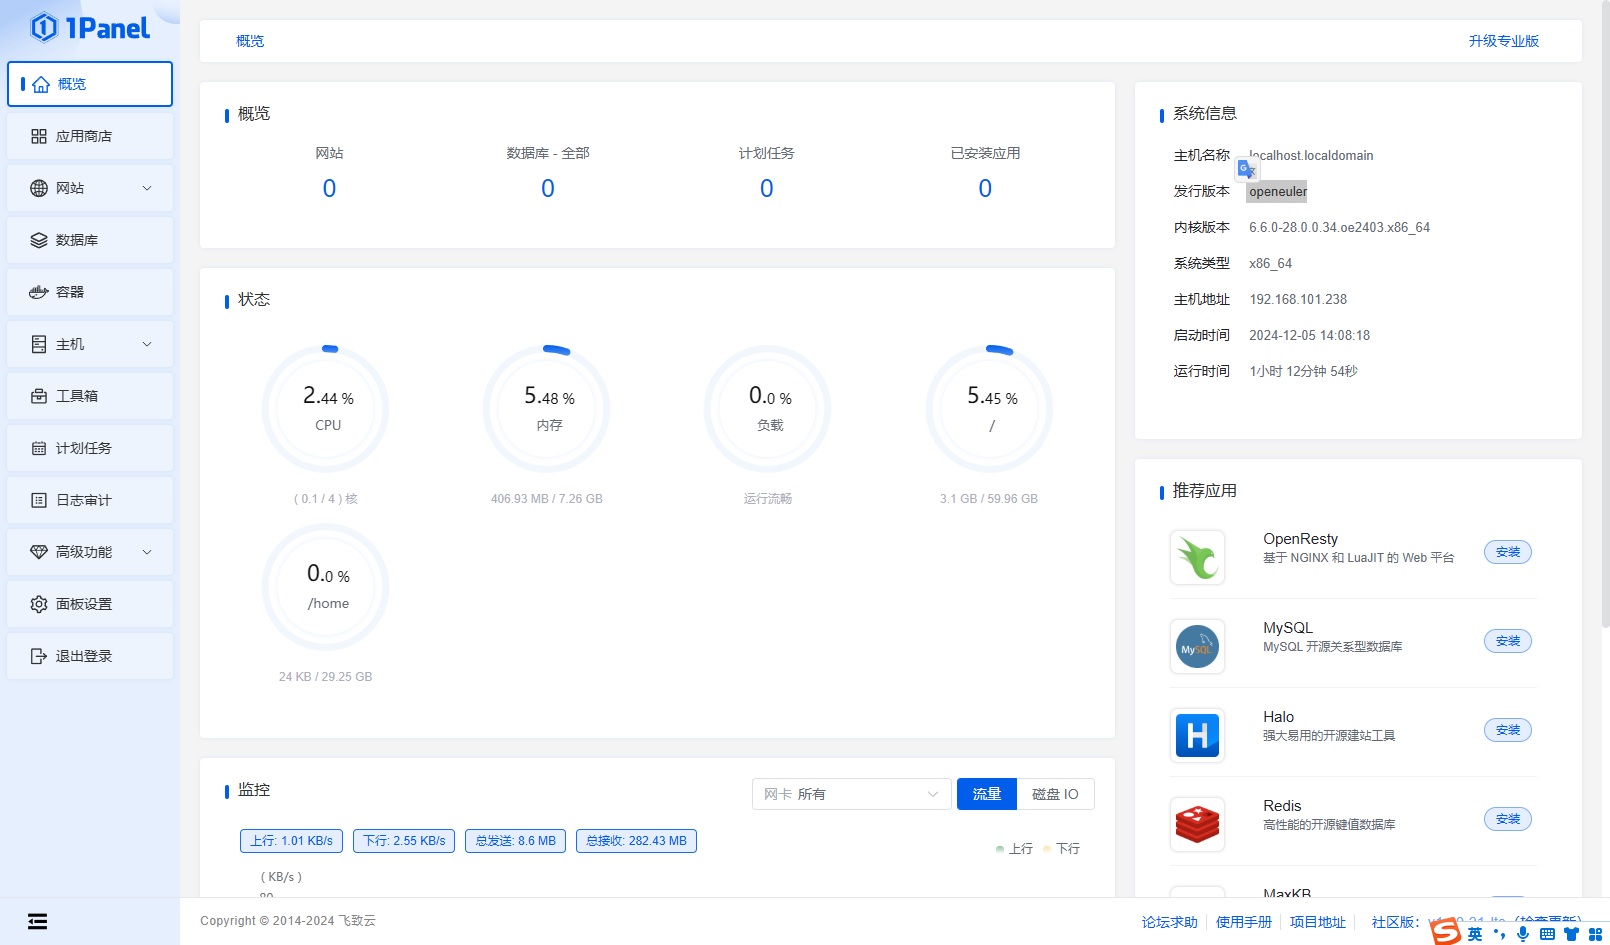
基于1Panel(Docker)搭建MySQL+WordPress OpenEuler用来做常用的服务器看是没有啥问题了,起码数据库和Web服务看起来都OK了。
MySQL on Docker 1 2 3 4 5 6 7 docker exec -it 1Panel-mysql-Y5Wi mysql -uroot -p show datebases; quit
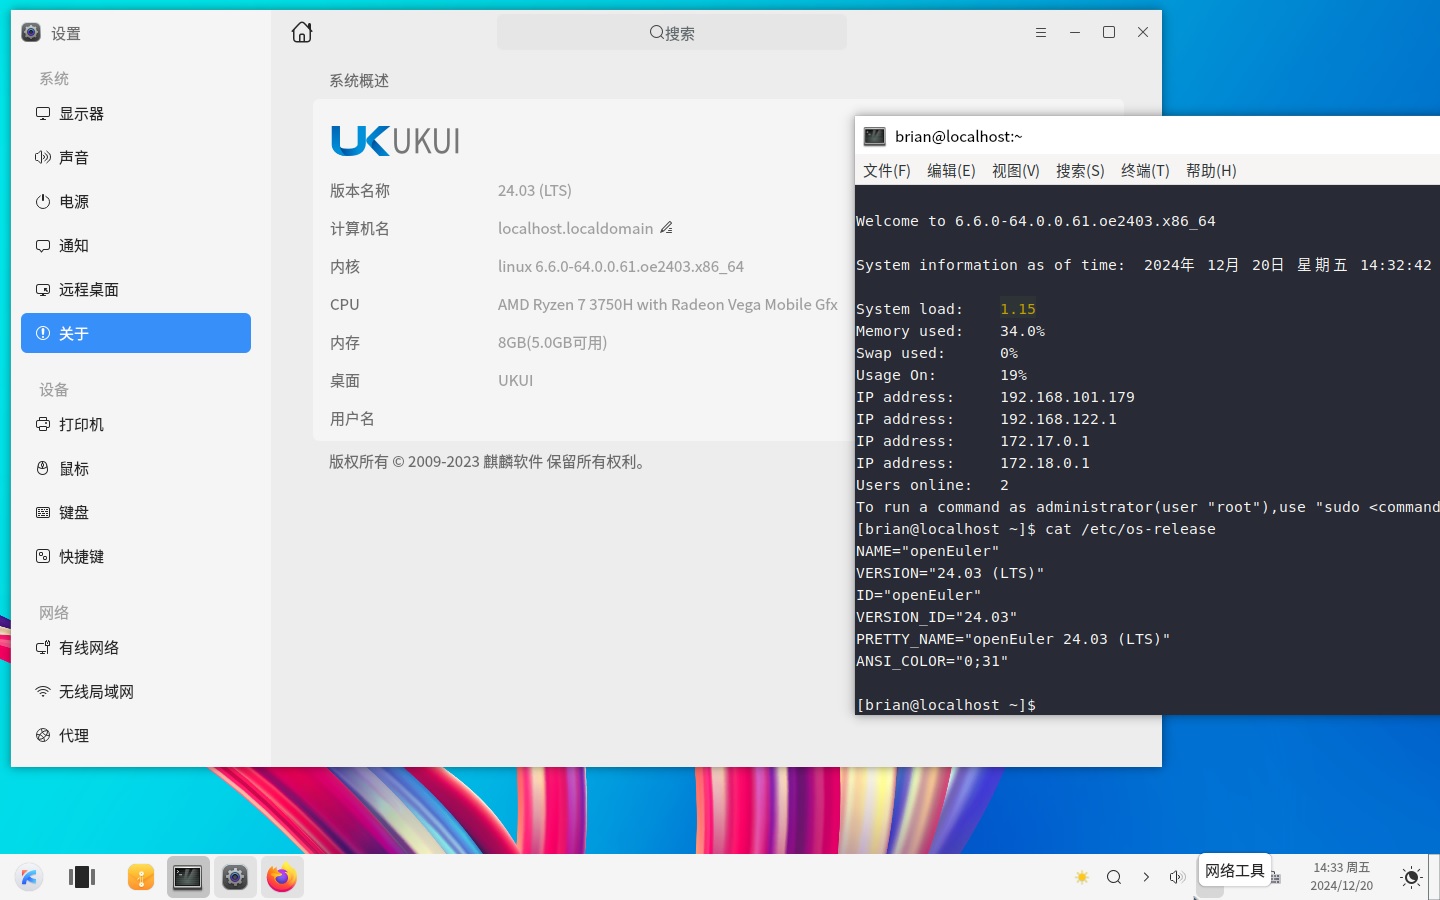
安装UKUI桌面环境 突然发现OpenEuler是支持很多款桌面环境的,如这款麒麟桌面:https://docs.openeuler.org/zh/docs/24.03_LTS/docs/desktop/%E5%AE%89%E8%A3%85UKUI.html 经过测试,Everything ISO里面不包含桌面环境,所以还是得每次都用网络下载,希望有大神能打包一个带桌面环境的ISO
所以我们还是老老实实用命令来安装桌面环境吧
1 2 systemctl set-default graphical.target
1 2 sudo useradd -m brian sudo passwd brian
sudo -i。不过可以通过ssh来登录自己从而进入root权限。
1 ssh root@192.168.101.179