Ubuntu初始化换清华源方法,apt使用,ibus拼音输入法
一个很牛逼的换源sh脚本linuxmirrors
官网:https://linuxmirrors.cn/use/
只需要一条命令,就能快速换源,不过还没有测试过。还支持一键安装Docker。
1 | bash <(curl -sSL https://linuxmirrors.cn/main.sh) |
24.04 换源方法不一样了,请注意!
20240814更新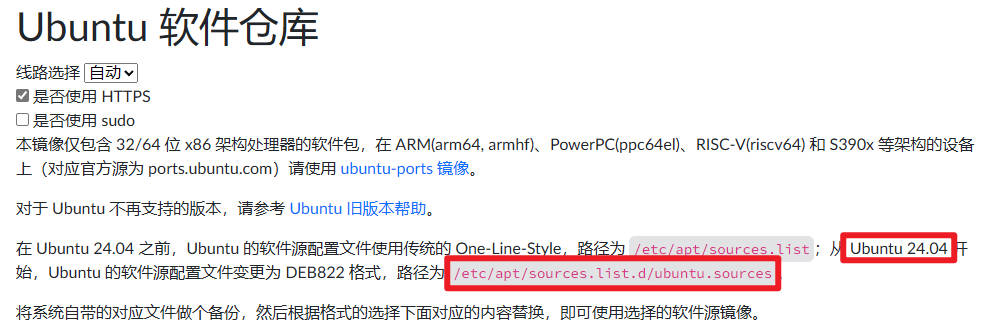
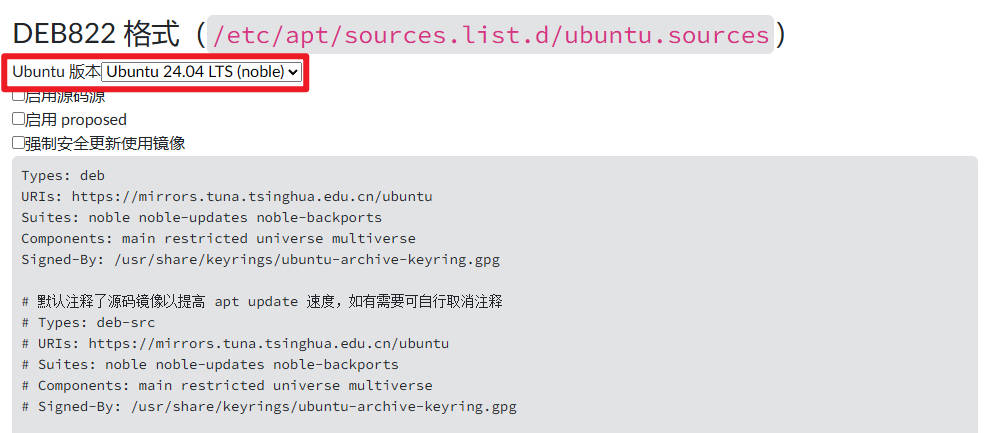
通过sudo vim /etc/apt/sources.list.d/ubuntu.sources来替换成下面的内容
1 | Types: deb |
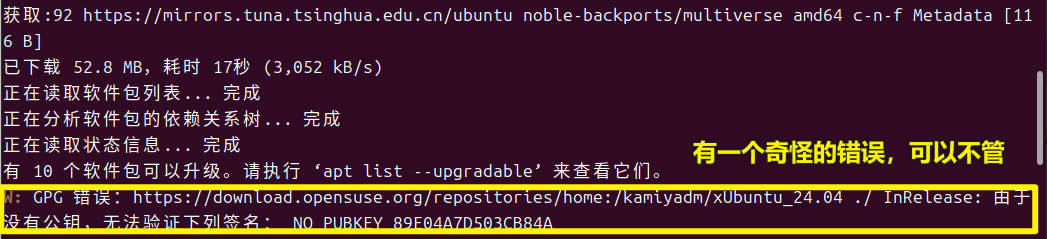
用sudo apt update会有如下奇怪的错误,可以不用管
(一)换清华apt源方法
(1)首先要用root去登录Ubuntu
1 | sudo -i |
(2)去到/etc/apt/找找有没有sources.list文件
1 | cd /etc/apt/ |
1 | root@DESKTOP-FH09R9R:/etc/apt# ls |
(3)备份sources.list文件
1 | root@DESKTOP-FH09R9R:/etc/apt# cp sources.list sources.list.backup |
(4)修改sources.list
1 | root@DESKTOP-FH09R9R:/etc/apt# vi sources.list |
进入网址:https://mirror.tuna.tsinghua.edu.cn/help/ubuntu/
复制里面的源的代码,替换sources.list的代码
1 | # 默认注释了源码镜像以提高 apt update 速度,如有需要可自行取消注释 |

vi或vim的使用方法说明:
- 进入后多按几次esc,确保进入了命令模式。
- 光标在第一行,不断按dd,按两次d键(小写的),直到所有行都被删除完了。如果内容特别多,可以不同按100dd,这样可以一次删除100行。
- 然后去复制上面的清华源代码,再按yy,按两次y(小写的)。被复制的清华源代码就会被粘贴进来。
- 如果第3步不行,就按i(小写的),进入插入模式,然后鼠标右键粘贴清华源代码。
- 如果清华源代码一字不差都粘贴进去了,就多按几次esc,确保自进入了命令模式。
- 按:wq(英文小写的),回车。就能成功保存。

1 | root@DESKTOP-FH09R9R:/etc/apt# cat sources.list |
(5)测试换源是否成功
1 | sudo apt update # 看看能不能读到有软件更新。 |
(6)还原回官方的源。
上面我们在/etc/apt/中备份sources.list.backup就是官方的源,如果出国了,可能官方的源比清华的好用。
1 | # 这样就能换回去官方的源了 |

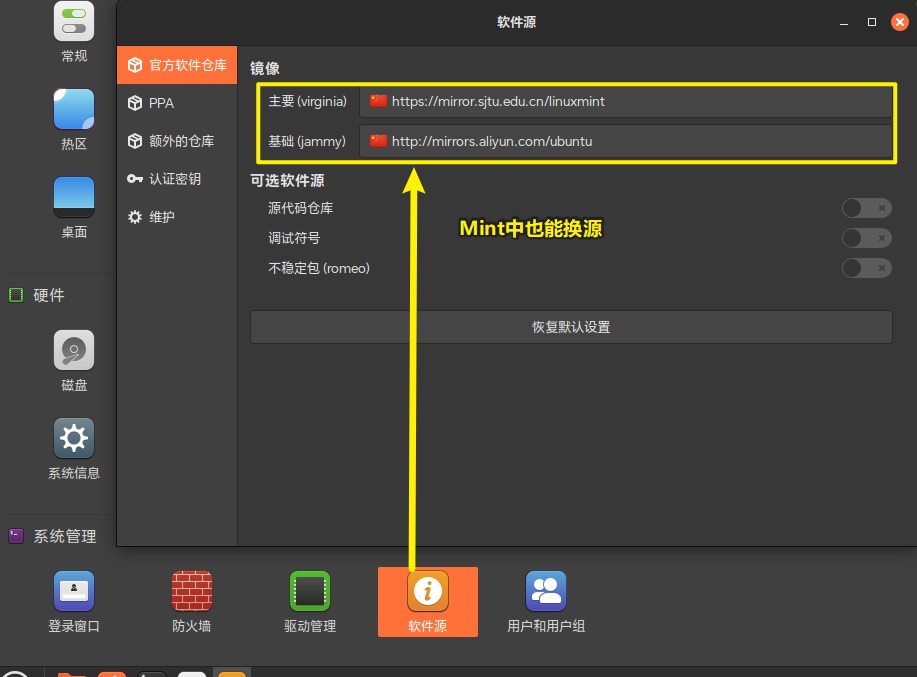
(7)通过Unbuntu的内置桌面配置也能进行换源

(8)Unbuntu同系列的发行版LinuxMint的内置桌面配置也能进行换源
(二)APT使用方法
sudo apt update(获取包列表更新)
等效于sudo apt-get update
换源是否成功,就看看执行sudo apt update是否能有HIT就行。有HIT就是成功了。

sudo apt list –upgradable(查看可更新包列表明细)
执行完sudo apt update后,用sudo apt list --upgradable就可以看到有哪些软件可以更新。如果执行sudo apt upgrade的话就会把这些软件全部进行更新了。
1 | apparmor/jammy-updates 3.0.4-2ubuntu2.3 amd64 [upgradable from: 3.0.4-2ubuntu2.2] |

sudo apt list –installed(列出安装了什么)
因为安装了的软件包可能会超级多。使用apt list --installed | grep "mysql"这个grep命令就可以做一下关键字的过滤。
1 | # 列出安装过哪些叫mysql的包 |

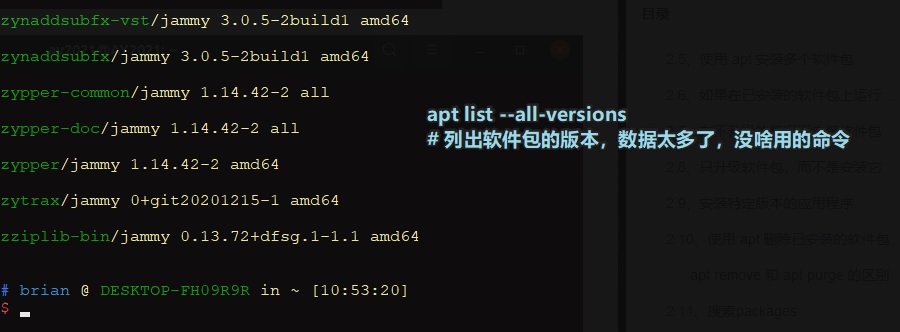
sudo apt list –all-versions(列出所有包的版本)
快速列出含有mysql关键字的包版本
sudo apt list --all-versions | grep "mysql" | grep "8.0"这样可以同时搜索两个关键字and与逻辑
sudo apt list --all-versions | grep -e "mysql" -e "8.0"这样可以同时搜索两个关键字or或逻辑
sudo apt list --all-versions | grep -v "lib" | grep "mysql"这样可以排除一些不需要的关键字后再搜索,是非的逻辑
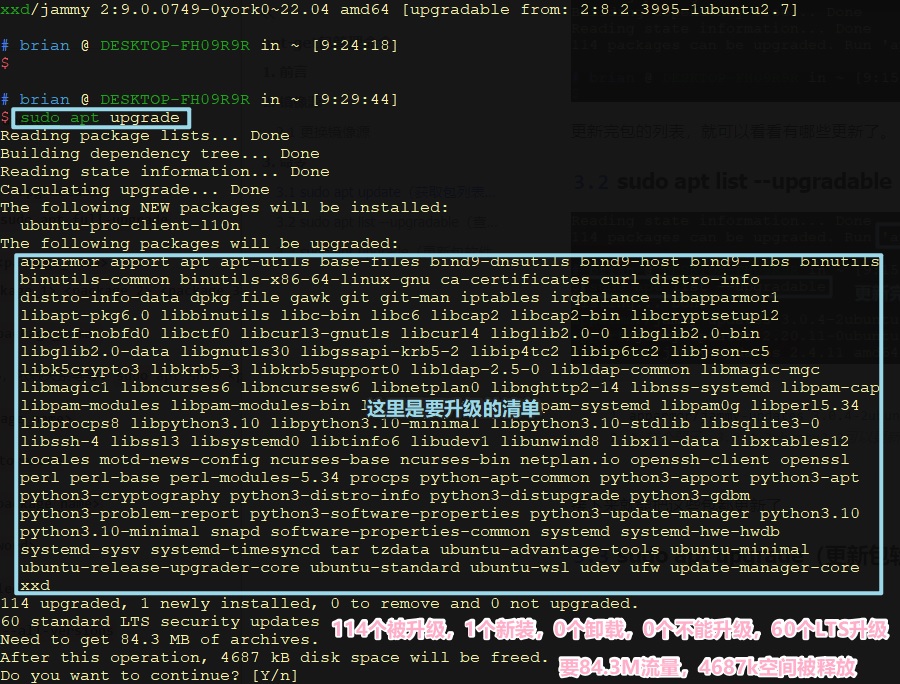
sudo apt upgrade(更新所有包软件)
等效于sudo apt-get upgrade
用sudo apt update只有哪些软件包需要更新后,就可以执行sudo apt upgrade来全部更新。
1 | sudo apt update && sudo apt upgrade -y |
1 | sudo apt full-upgrade # 卸载了再安装新版 |
sudo apt search <包名>(查找包命令)
查找包列表库中的包,除了包名,包中简单描述也有。通过sudo apt search <包名>这个命令可以找到需要的包的正确名字,然后通过sudo apt install来安装。当然,用sudo apt list --all-versions | grep "mysql"命令来找到软件包的正确名字也行。

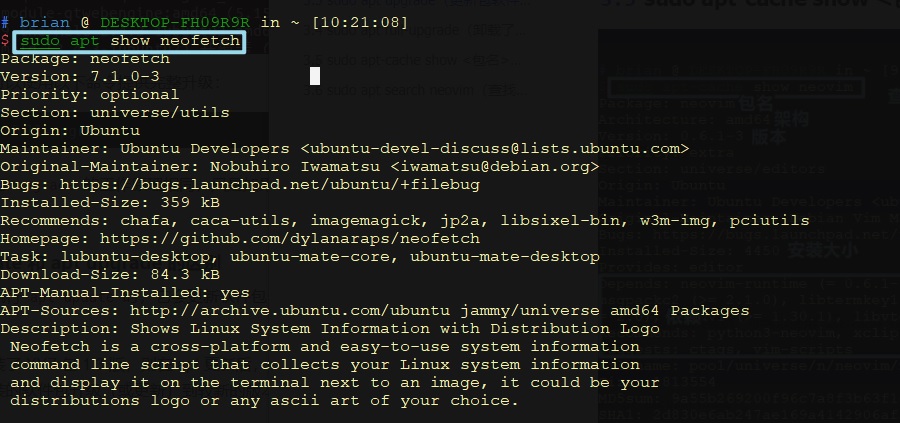
apt show <包名> (查找包的详细信息)
sudo apt-cache show <包名> (查找包的详细信息)
1 | apt-cache show package # 显示指定包的详细信息,包括版本号、依赖关系、描述等。 |
一般是在安装或卸载软件包前查找一下具体情况,内容过于详细,除非知道绝对正确的报名,不然不要用这个命令。sudo apt show <包名> # 可以达到同样的搜索效果。

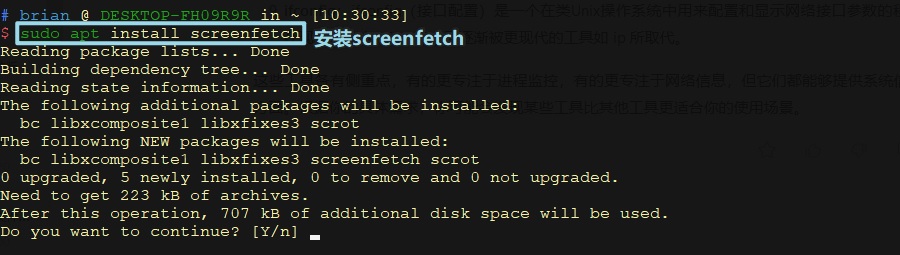
sudo apt install <包名>(安装软件包)
等效于sudo apt-get install pkg
需要知道绝对的包名,安装的时候一般会把相关的依赖一起安装了。但是很多时候还会差很多配套的包,如安装fcitx的时候,很多配套的fcitx-qt5、im-chooser、fcitx-pinyin、fcitx-configtool、fcitx5-chinese-addons等的包都需要安装才能使用,需要慢慢摸索,看官方文档,看别人的解决方法,不同的Linux发行版还会有差别。这就是为什么Linux为什么让新手感觉非常不好用的原因,太自由就有不少的混乱,很多时候老鸟都解决不了输入法的问题
1 | # 同时安装多个包 |
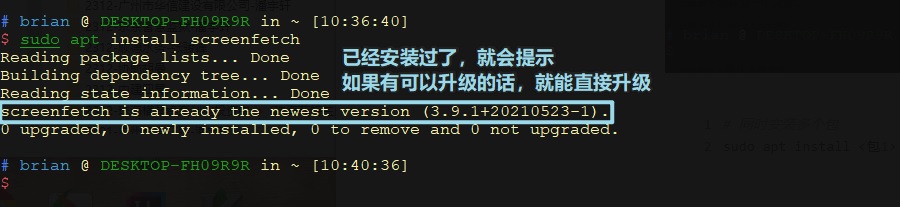
如果这个软件包已经安装过了,但是有新版本,就会提示进行升级,而不是全新安装。
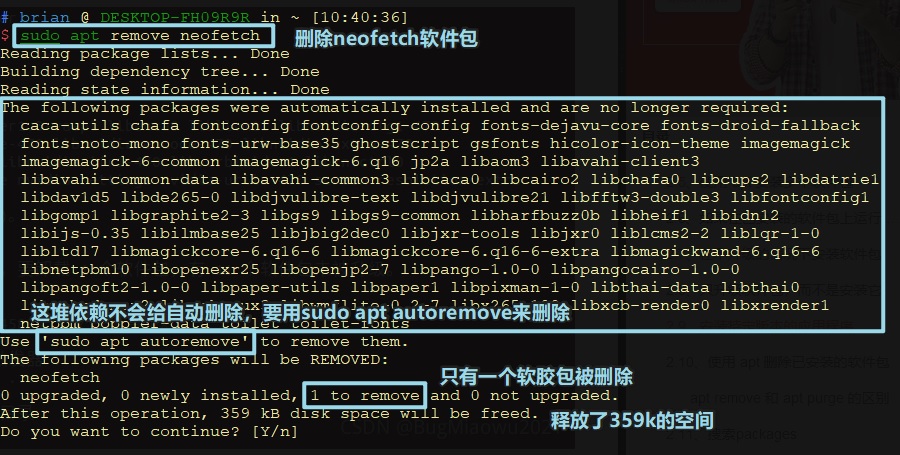
sudo apt remove <包名>(删除软件包,保留配置)
等效于sudo apt-get remove pkg
1 | sudo apt remove <包名> # 删除二进制文件,但是会留下配置文件。一般只用这个就够。 |
sudo apt purge <包名>(删除软件包,不保留配置)
等效于sudo apt-get purge pk
sudo apt autoremove(自动删除不需要的依赖)
等效于sudo apt-get autoremove
上面的sudo apt remove <包名>是不会删除相关的依赖的,如果要删除没有用了的依赖,就可以执行sudo apt autoremove

sudo apt reinstall <包名>(重新安装包)
1 | sudo apt reinstall neofetch |
(三)iBus中文拼音输入法 22.04
在安装系统的时候选择用中文(简体)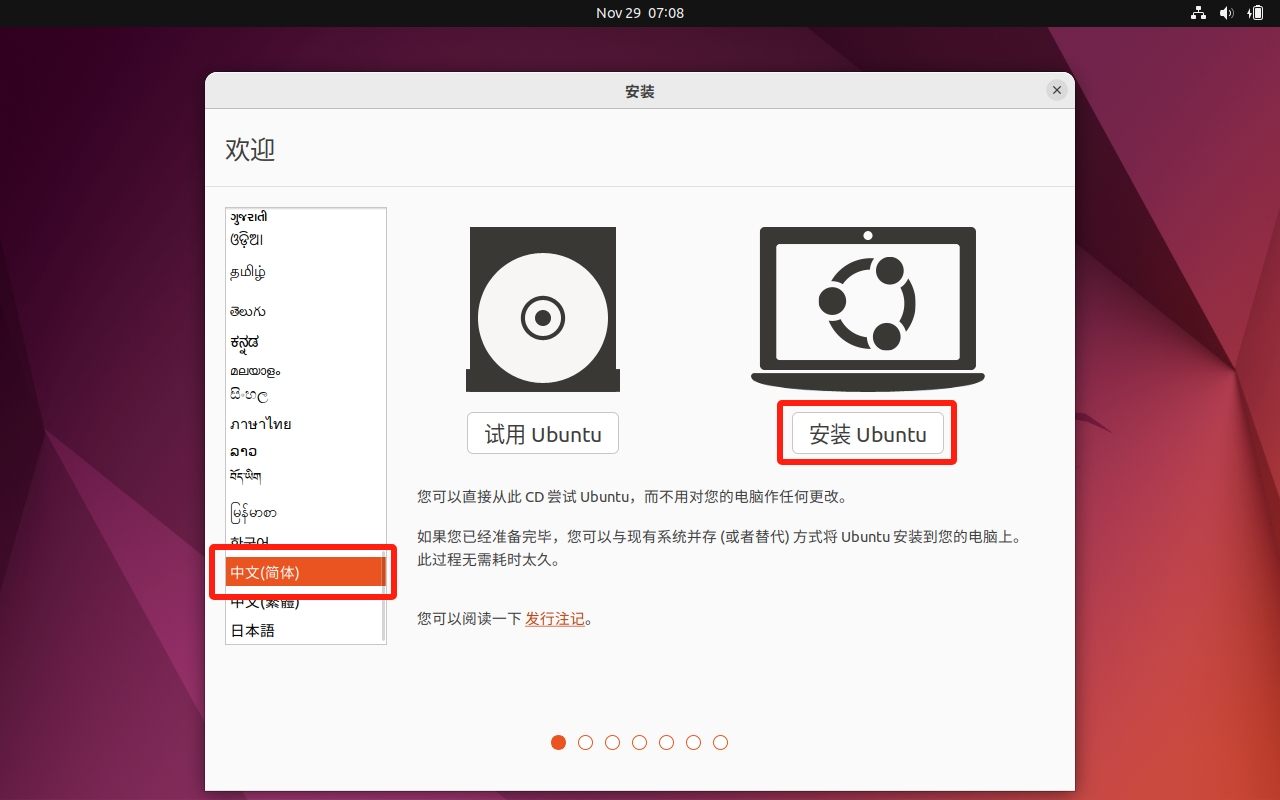
选择键盘布局是Chinese - Chinese Hanyu Pinyin(with AleGr dead keys)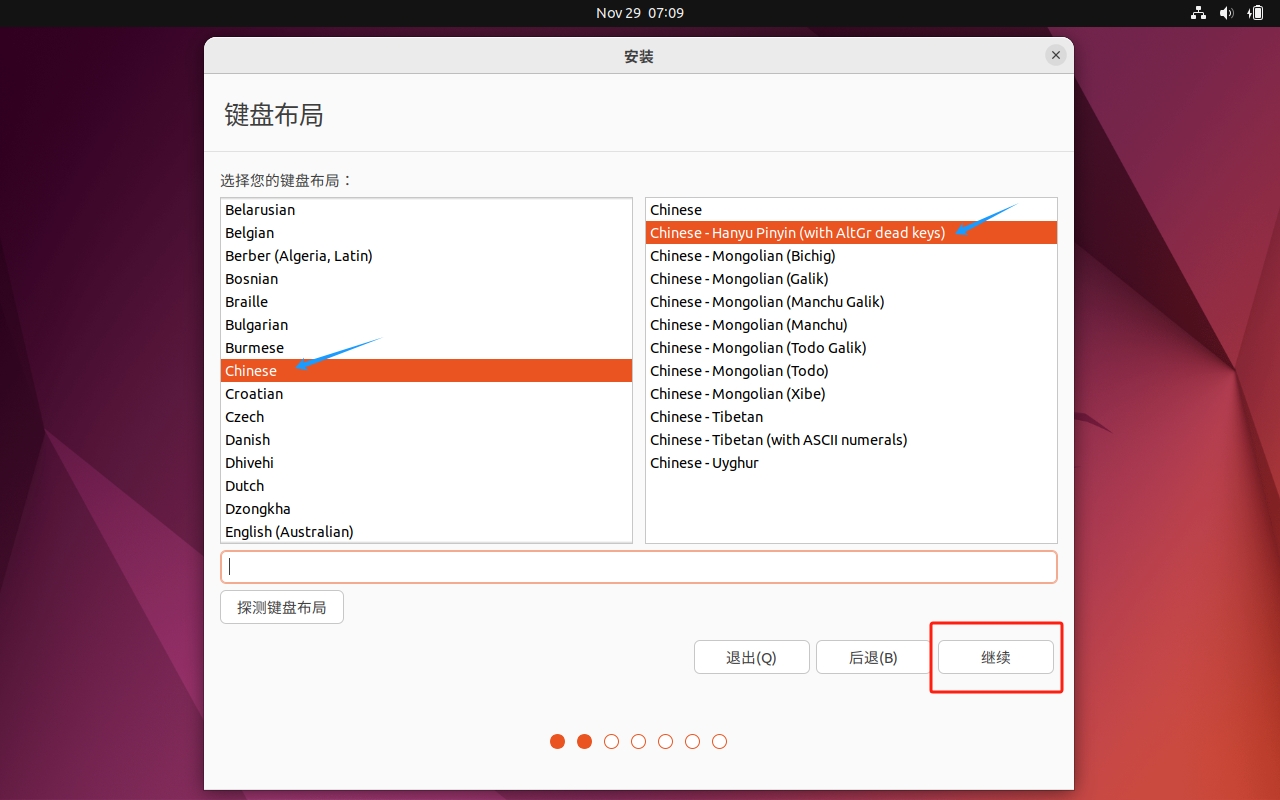
安装完系统后
在【设置】中确认【键盘】的输入法有没有“中文(智能拼音)”
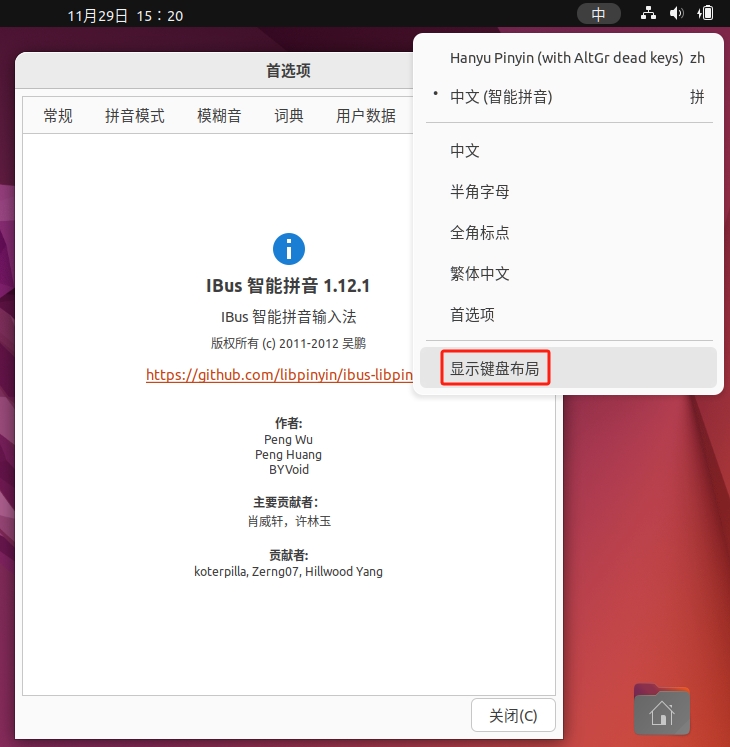
在右上角点击输入法,看看有没有“中文(智能拼音)”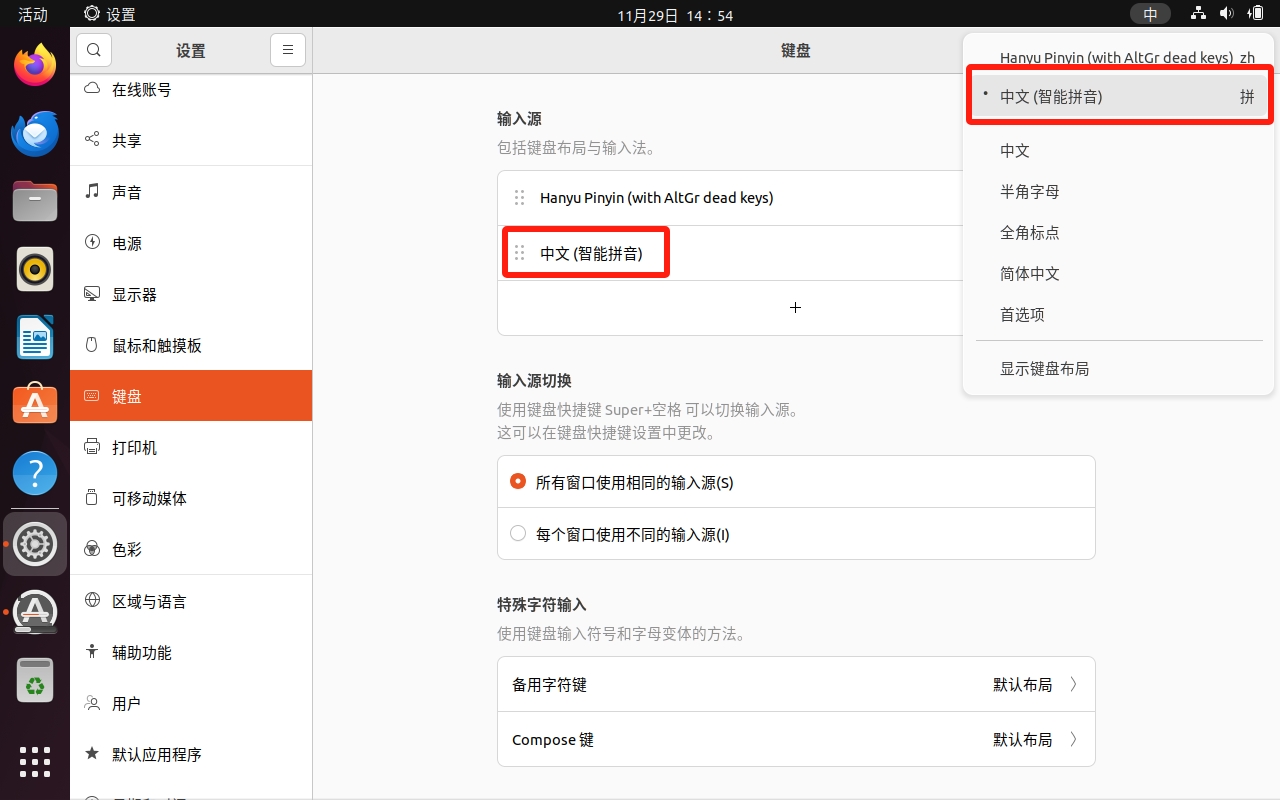
如果没有,就要确保在【设置】中的【语言(L)】是否“汉语”?
如果不是汉语就要修改回来,详细见下图: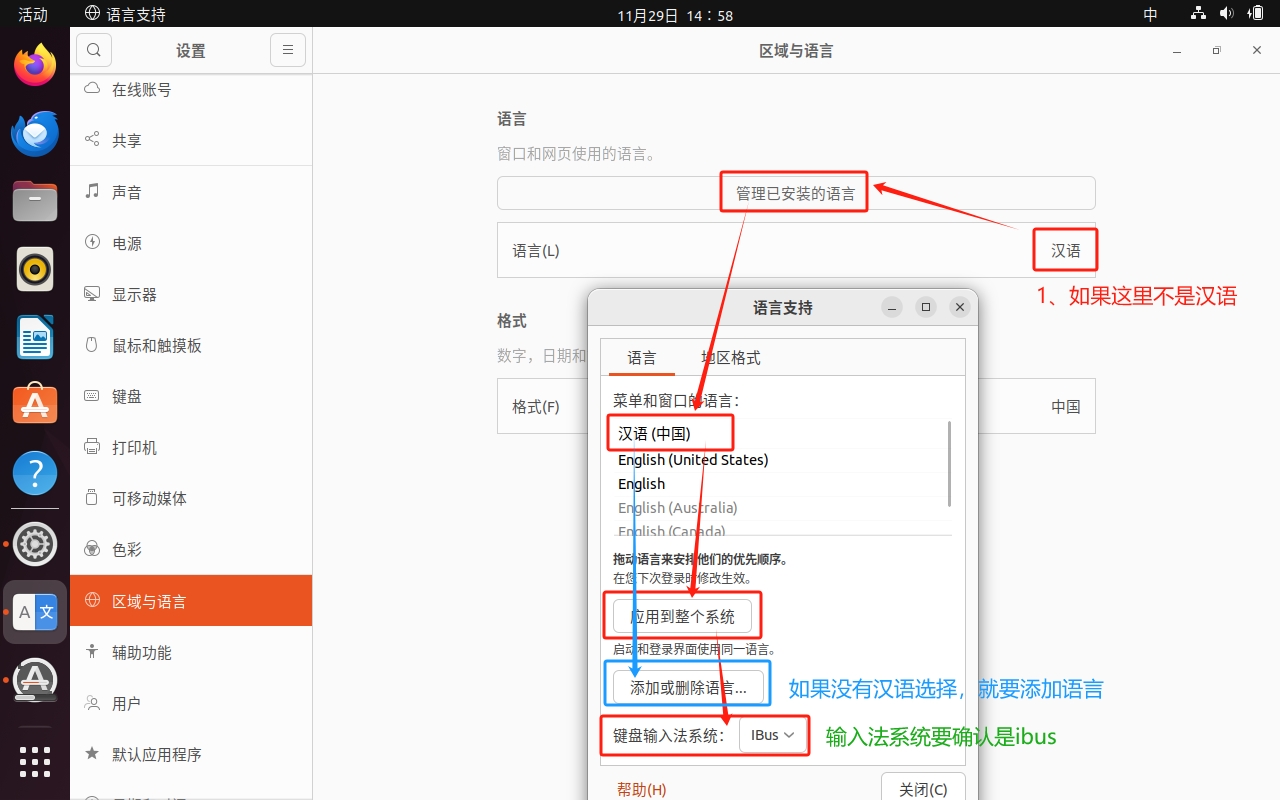
测试一下,可以中文输入了
点击这里可以做一些输入法的配置,默认按shift键来切换中英文输入。